First, what are the core characteristics and hazards of processing deformation in
thin-walled seamless steel pipes?
(1) Core Characteristics of Deformation in Thin-Walled Seamless Steel Pipes
Due to their thin-walled thickness and poor rigidity, thin-walled seamless steel pipes are prone to three typical types of deformation during processing:
Clamping Deformation: Elliptical deformation caused by radial clamping force; elastic rebound after releasing the clamp causes "triangular distortion" of the inner hole.
Cutting Deformation: Warping and uneven wall thickness caused by cutting force and vibration, especially significant when the diameter-to-thickness ratio is >30.
Thermal Deformation: Uneven thermal expansion caused by cutting heat or heat treatment, manifested as dimensional drift and shape deviation.
(2) Hazards of Deformation in Thin-Walled Seamless Steel Pipes
Deformation directly leads to the exceeding of key precision indicators in thin-walled seamless steel pipes: inner hole roundness error >0.04mm, coaxiality deviation >0.05mm, surface roughness Ra >1.6μm, which in turn affects the fitting accuracy with shaft parts, causing assembly difficulties, increased operating vibration, and even shortening the service life by more than 30%.
Second, what are the key factors causing deformation during the machining of thin-walled seamless steel pipes?
(1) Mechanical Factors: The Synergistic Effect of Clamping and Cutting Forces
Improper clamping force: The three-point clamping of traditional three-jaw chucks leads to stress concentration, with the pressure per unit area exceeding the material's yield strength, causing plastic deformation.
Unbalanced cutting force: Excessive radial cutting force and insufficient tool principal cutting edge angle easily lead to workpiece vibration and warping, especially when the rigidity of thin-walled parts is insufficient; the deformation is positively correlated with the cutting force.
(2) Thermal Factors: Uneven Temperature Field Distribution
Thin-walled parts have low thermal conductivity, and cutting heat easily accumulates, resulting in local differences in thermal expansion of 0.02~0.05mm;
Uncontrolled heat treatment process parameters lead to residual stress concentration, and stress release during subsequent machining causes deformation.
(3) Process and Equipment Factors
Excessive single-pass machining allowance and failure to separate roughing and finishing processes lead to residual stress accumulation.
Machine tool spindle runout > 0.01mm and guide rail straightness deviation > 0.02mm/m amplify machining deformation;
Tool wear causes a sudden increase in cutting force, exacerbating vibration deformation.
Third, what are the key technical solutions for deformation control in thin-walled seamless steel pipe machining?
(1) Optimization of Clamping System for Thin-Walled Seamless Steel Pipes: Low-Stress Clamping Technology
New fixture selection and combination: The INOFlex four-jaw conformal adaptive chuck is adopted, achieving uniform force through adaptive adjustment of the jaws, reducing clamping deformation to less than 10% of that of traditional chucks; For ultra-thin-walled parts, the INOTop pressure-free clamping module is used to convert radial clamping force into axial positioning force, almost eliminating clamping deformation; For conventional thin-walled parts, a "standard three-jaw chuck + INOZet six-point support module" is used, changing three-point contact to six-point contact, increasing rigidity by 50%, and controlling ellipticity within 0.015mm.
Traditional fixture improvements: Soft jaw self-boring treatment increases contact area; slotted sleeves or elastic expansion sleeves are used to evenly distribute clamping force on the workpiece's outer diameter, reducing pressure per unit area by 30%~40%.
(2) Refinement of cutting process for thin-walled seamless steel pipes: Low-stress cutting technology
Tool selection and parameter optimization
Tool material: PCBN or CBN coated tools are selected, with a rake angle of 5°~ to -10 ° and a clearance angle of 8°~12° to enhance cutting edge strength;
Cutting parameters: A "low speed + low feed + small depth of cut" strategy is adopted—cutting speed vc=35~80m/min, feed rate f=0.03~0.12mm/r, depth of cut ap=0.1~0.3mm/cut, avoiding excessive single-cut allowance;
Tool angle: Principal cutting edge angle κr=75°~90°, reducing radial cutting force and lowering deformation risk.
Process Route Restructuring
Implement a "rough-semi-finish-finish" segmented machining process, adding a stress-relief step between each segment to release residual stress;
Adopt a "one-cut" process: complete the machining of inner and outer circles and end faces in one clamping, eliminating positioning errors from multiple clampings, and improving coaxiality to within 0.02mm.
(3) Thermal Deformation Control of Thin-Walled Seamless Steel Pipes: Precise Temperature Field Regulation
Cooling and Lubrication Optimization: High-pressure cooling system, precise spraying of the cutting edge, reducing cutting temperature to below 500℃; for stainless steel machining, emulsions containing extreme pressure additives are used to avoid tool sticking and heat accumulation.
Heat Treatment Process Improvement: Tempering adopts "stepped heating + uniform cooling": segmented heating from 850~900℃, with oil cooling + air cooling combination during the cooling stage, controlling temperature fluctuations within ±5℃; low-temperature stress-relief annealing is added before finishing, reducing residual stress to below 50MPa.
(4) Monitoring and Error Compensation in the Processing of Thin-Walled Seamless Steel Pipes
Equipped with a cutting force sensor and an infrared thermometer, the cutting force and temperature are monitored in real time. When the cutting force suddenly increases by 15% or the temperature is≥700℃, the cutting speed is automatically reduced by 10%~15%. An online diameter gauge is used to provide real-time feedback on the inner hole size. The tool feed rate is dynamically compensated through the CNC system, with a compensation accuracy of 0.002mm.
Fourth. Engineering Application Cases and Effect Verification
(1) Case Parameters
Workpiece: φ40×2mm 304 stainless steel sleeve. Requirements: inner hole roundness ≤0.02mm, coaxiality ≤0.03mm, ovality ≤0.015mm;
Original Process Problem: Traditional three-jaw chuck clamping resulted in an ovality of 0.12mm and an inner hole roundness of 0.08mm, with a pass rate of only 82%.
(2) Improvement Scheme
Clamping: Standard three-jaw chuck + INOZet six-point support module + soft jaw self-boring;
Cutting: PCBN tool, vc=50m/min, f=0.05mm/r, ap=0.2mm/tool, high-pressure cooling;
Process: Rough turning → Stress-relief annealing → Semi-finish turning → Stress-relief annealing → Finish turning.
(3) Improvement Results
Deformation significantly reduced: ovality ≤0.012mm, inner hole roundness ≤0.018mm, coaxiality ≤0.025mm; accuracy pass rate increased to 99.2%, scrap rate decreased from 18% to 0.8%; the clearance fluctuation range between the steel sleeve and the shaft decreased from 0.005~0.028mm to 0.009~0.022mm, and the fit stability improved by 45%.
 Threeway Steel is known as a professional supplier engaged in manufacturing and distributing a wide range of steel pipe, and our headquarter located the central part of China – Hunan and six associated factories throughout China.
 Threeway Steel is known as a professional supplier engaged in designing, manufacturing and distribution of a wide range of steel products with the headquarter located the central part of China – Hunan and six associated factories throughout China.
 Threeway Steel is known as a professional supplier engaged in designing, manufacturing and distribution of a wide range of steel products with the headquarter located the central part of China – Hunan and six associated factories throughout China.
 Threeway Steel is known as a professional supplier engaged in designing, manufacturing and distribution of a wide range of steel products with the headquarter located the central part of China – Hunan and six associated factories throughout China.
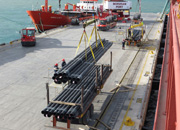 Threeway Steel is known as a professional supplier engaged in designing, manufacturing and distribution of a wide range of steel products with the headquarter located the central part of China – Hunan and six associated factories throughout China.

