First, what are the material properties of precision steel pipes?
The inherent properties of the raw materials are the fundamental conditions determining the surface integrity of precision steel pipes. Their chemical composition, microstructure, mechanical properties, and initial surface state directly affect the material removal method and surface layer evolution during processing, and are fundamental factors that are difficult to completely offset by subsequent process control.
(1) Chemical Composition and Impurity Distribution
The chemical composition of the material directly determines its machinability, thus affecting surface integrity. On the one hand, the type and content of alloying elements will change the material's hardness, toughness, and thermal conductivity. On the other hand, the content and distribution of non-metallic inclusions in the raw materials are key hidden dangers that damage surface integrity. Inclusions have weak bonding forces with the base metal and are easily detached under cutting forces during processing, forming surface micro-pits; if inclusions are continuously distributed, they may also form micro-cracks on the surface.
(2) Microstructure State
The microstructure of the raw materials has a significant impact on the surface integrity of the processed material. Coarse and uneven grains lead to uneven plastic deformation of the metal during processing, resulting in discontinuous material removal during cutting, forming surface ripples and serrated defects, and exacerbating surface roughness fluctuations. Conversely, fine and uniform grains improve material flowability during cutting, reduce cutting force fluctuations, and facilitate the obtaining of a smooth surface.
(3) Initial Mechanical Properties and Surface Condition
The initial hardness, yield strength, and toughness of the raw material determine the degree of surface layer deformation and damage risk during processing. Materials with excessively high hardness experience high cutting forces during processing, easily leading to excessive work hardening, increasing surface hardness by more than 50%, resulting in increased surface brittleness and a tendency to generate microcracks. Materials with excessively high toughness are prone to cutting adhesion, forming surface burrs. Simultaneously, the initial surface condition of the raw material directly affects the surface integrity of subsequent processing: if the initial oxide scale is not completely removed, it will exacerbate tool wear during processing and form surface indentations under cutting forces; while initial surface scratches will be stretched and extended during subsequent plastic processing, forming longer surface grooves that cannot be eliminated through subsequent finishing.
Second, what are the processing technologies for precision steel pipes? Processing technology is a core variable affecting the surface integrity of precision steel pipes. From pretreatment and forming to finishing and post-treatment, the rationality of process parameters and the synergy of process steps directly determine the final state of surface geometry and surface layer mechanical properties, and are key to surface quality control.
(1) Pretreatment Process
The pretreatment process optimizes the state of raw materials, laying the foundation for the surface integrity of subsequent processing. The core function of annealing is to eliminate residual stress in the raw materials and refine grains. If the annealing temperature is insufficient or the holding time is too short, the residual stress in the raw materials will not be fully released, and stress redistribution during subsequent processing will lead to surface ripples and microcracks. If the annealing temperature is too high, it will lead to coarse grains, which will reduce the surface quality. The quality of pickling and phosphating processes directly affects surface cleanliness and lubrication performance: incomplete pickling will leave oxide scale and rust, scratching the surface of subsequent processing; uneven or insufficient phosphating film will lead to lubrication failure, increasing friction between the mold and the steel pipe surface, forming surface scratches.
(2) Forming Process Parameters
The parameters of forming processes, such as cold drawing, cold rolling, and extrusion, control surface integrity by influencing the plastic deformation state of the metal. In cold drawing, drawing speed, drawing force, and die clearance are the core influencing parameters: excessive drawing speed leads to uneven metal flow and surface ripples; excessive drawing force exacerbates surface work hardening and may even cause surface microcracks; insufficient die clearance leads to over-extrusion and surface indentations; excessive die clearance leads to insufficient metal deformation and increased surface roughness. In cold rolling, rolling speed, rolling pressure, and roll precision directly affect surface quality: poor roll surface roughness leads to repetitive scratches on the steel pipe surface; fluctuations in rolling pressure cause uneven surface thickness and ripples.
(3) Finishing Process
Parameters Finishing processes such as turning, grinding, and polishing are the key links that ultimately determine surface integrity, and precise matching of process parameters is crucial. In turning, the combination of cutting speed, feed rate, and depth of cut directly affects surface roughness and work hardening: Too low a cutting speed easily leads to built-up edge and burrs, causing a sharp increase in surface roughness; too high a cutting speed causes a sudden increase in cutting temperature, triggering surface oxidation and microstructure phase transformation, generating residual tensile stress; an increased feed rate increases the depth of residual tool marks, directly improving surface roughness; an excessive depth of cut exacerbates cutting force fluctuations, causing surface ripples. In grinding, the matching of grinding wheel speed, grinding depth, and feed rate affects surface quality: too low a grinding wheel speed leads to insufficient grinding, leaving residual grinding marks; too high a speed generates excessive grinding heat, causing surface burns and microcracks; an excessive depth of cut easily leads to excessive work hardening.
(4) Post-processing
Post-processing improves surface integrity through secondary optimization, but improper post-processing can actually damage surface quality. Precision polishing processes such as magnetorheological polishing and chemical polishing can significantly reduce surface roughness, but over-polishing can exacerbate surface work hardening and reduce surface toughness. If mechanical grinding is used for deburring, excessive grinding force can easily produce surface scratches and residual tensile stress. Aging treatment can eliminate residual stress, but improper temperature control can lead to surface oxidation or changes in microstructure.
Third, what are the performance characteristics of precision steel pipe processing equipment and tools?
The precision, stability, and performance matching of processing equipment and tools directly determine the stability of the cutting/forming process and are the core hardware support for ensuring surface integrity. Even minor defects in equipment and tools can be amplified, leading to surface quality deterioration.
(1) Precision and Stability of Processing Equipment
The motion precision and rigidity of the equipment are the foundation for controlling surface integrity. Regarding spindle precision, radial runout and axial movement of the spindle can cause fluctuations in the relative position of the tool and workpiece, resulting in surface ripples and shape errors. If the spindle radial runout exceeds 0.005mm, the roundness error of the inner hole of the steel pipe after precision grinding will exceed 0.003mm, and the surface roughness will increase by more than 30%. Regarding guide rail accuracy, straightness, and parallelism errors in the guide rail can cause the tool movement trajectory to deviate from the ideal path, resulting in defects such as surface taper and non-straight generatrix. Linear guide rails, compared to ordinary sliding guide rails, can improve positioning accuracy by more than 40% and effectively reduce surface ripples. Regarding equipment rigidity, insufficient rigidity of the machine tool bed and tool post can cause elastic deformation under machining loads, especially in the machining of steel pipes with large length-to-diameter ratios, leading to inconsistent cutting depths and uneven surface wall thickness and ripples. Furthermore, insufficient response speed and control precision of the equipment's servo system can cause misalignment between feed rate and cutting speed, exacerbating surface roughness fluctuations.
(2) Tool/Die Performance
The performance of the tool and die directly determines the material removal quality and surface contact state. Regarding tool/die materials, using PCD diamond or CBN superhard materials can reduce wear and achieve lower surface roughness; if ordinary high-speed steel is used, the tool/die wears quickly and is prone to surface scratches. Regarding tool geometry, an excessively small rake angle increases cutting force, leading to accelerated surface work hardening; an excessively large rake angle reduces tool strength and causes tool vibration; an excessively small clearance angle increases friction with the workpiece surface, resulting in extrusion scratches. Regarding tool/die surface condition, poor surface roughness and the presence of micro-defects directly replicate on the steel pipe surface, leading to surface quality deterioration. Experiments show that when tool wear exceeds 0.2 mm, significant tearing defects appear on the precision-machined surface, with the surface roughness Ra value increasing from 0.4 μm to over 1.5 μm.
Fourth, what are the requirements for the machining environment of precision steel pipes?
Although factors such as temperature, humidity, and vibration in the machining environment do not directly participate in the machining process, they indirectly interfere with machining stability, thereby affecting surface integrity. Their impact is insidious but cannot be ignored.
(1) Temperature Environment Fluctuations in ambient temperature and temperature increases during machining both affect surface integrity through thermal expansion and contraction. For every 5°C change in ambient temperature, the length of a φ100mm precision steel pipe will change by approximately 0.06mm. Simultaneously, the temperature gradient between the surface layer and the substrate will induce thermal stress, leading to surface microcracks. The accumulation of cutting and grinding heat during processing will cause localized temperature increases in the workpiece, inducing surface oxidation, microstructural phase transformation, and residual stress changes.
(2) Humidity and Cleanliness Environment. Excessive ambient humidity easily leads to rust on the steel pipe surface, especially during machining intervals. Rust will damage the machined surface, forming rust spots. Simultaneously, humidity changes will affect the emulsification stability of the cutting fluid, reducing lubrication and exacerbating surface friction damage. Insufficient cleanliness of the machining environment allows airborne dust and metal debris to adhere to the workpiece or tool surface, forming surface indentations and scratches during processing.
(3) Vibration Environment Vibration during processing will disrupt the relative positional stability of the tool and workpiece, forming periodic surface vibration marks, which can, in severe cases, cause surface microcracks. Machine tool spindle imbalance and excessive guide rail clearance can cause their own vibration; the operation of peripheral stamping equipment, fans, etc., can cause external interference vibration; and fluctuations in cutting force during the cutting process can cause cutting vibration
 Threeway Steel is known as a professional supplier engaged in manufacturing and distributing a wide range of steel pipe, and our headquarter located the central part of China – Hunan and six associated factories throughout China.
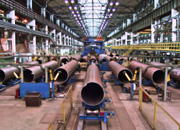 Threeway Steel is known as a professional supplier engaged in designing, manufacturing and distribution of a wide range of steel products with the headquarter located the central part of China – Hunan and six associated factories throughout China.
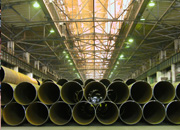 Threeway Steel is known as a professional supplier engaged in designing, manufacturing and distribution of a wide range of steel products with the headquarter located the central part of China – Hunan and six associated factories throughout China.
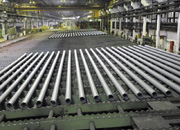 Threeway Steel is known as a professional supplier engaged in designing, manufacturing and distribution of a wide range of steel products with the headquarter located the central part of China – Hunan and six associated factories throughout China.
 Threeway Steel is known as a professional supplier engaged in designing, manufacturing and distribution of a wide range of steel products with the headquarter located the central part of China – Hunan and six associated factories throughout China.

